Why keys?
SSH keys serve as a means of identifying yourself to an SSH server using public-key cryptography. One immediate advantage this method has over traditional password authentication is that you can be authenticated by the server without ever having to send your password over the network. In addition to this additional security, SSH key authentication can be more convenient than the more traditional password authentication. When used with a program known as an SSH agent, SSH keys can allow you to connect to a server, or multiple servers, without having to remember or enter your password for each system.
If you just want to make your key and get out of here, click your OS below
A bit of theory
Wikipedia has a good article on this concept, but I will briefly cover the main points here.
In public-key authentication, a pair of unique keys are generated, one of which is used to encrypt data, and the other is used to decrypt. As implemented, these are respectively known as public and private keys.

When you run ssh-keygen, this key pair is generated as two files called id_rsa and id_rsa.pub. id_rsa.pub contains your public key, and the contents of this file are added to a list of authorized keys (usually a file called authorized_keys) on the SSH server to grant access to the user with the matching private key. It is important to keep your private key secret, as anyone who possesses it can potentially log in as you without a password (we'll get to protecting your private key with a passphrase in a bit).
Generating and using keys on Linux and OS X
(and any other Unix-like OS with OpenSSH)
Assuming that you are logged in as you, open up a terminal and run
ssh-keygen -t rsa -b 2048
You'll see something like this:
$ ssh-keygen -t rsa -b 2048
Generating public/private rsa key pair.
Enter file in which to save the key (/home/user/.ssh/id_rsa):
You can typically leave this as is. It will create the keys in your ~/.ssh directory by default.
Enter passphrase (empty for no passphrase):
Enter same passphrase again:
You will definitely want to use a strong passphrase for your key. This is used to unlock the private key so that it can be used, and is the last line of defense if your private key is stolen.
Your identification has been saved in /home/user/.ssh/id_rsa.
Your public key has been saved in /home/user/.ssh/id_rsa.pub.
The key fingerprint is:
e8:f5:96:98:d3:b3:09:c3:54:69:aa:aa:37:41:cc:80 user@somehost.example.com
The key fingerprint is a hash of your key that uniquely identifies it. You can use this to, for example, compare keys added in a github account to your keys without seeing the key itself. You can calculate the fingerprint for a key with ssh-keygen -lf <keyfile>, where <keyfile> is a public or private key.
And there you go, you have a shiny new key. Get your public key (the contents of id_rsa.pub) added to some hosts, and you're in business.
Agent Forwarding
This section was removed due to security concerns.
Generating and using keys on Windows with PuTTY and Pageant
Windows is not a native speaker of SSH, but luckily there is an great third-party implementation called PuTTY. Go ahead and fetch the Windows install package here and run the installer. I'll wait.
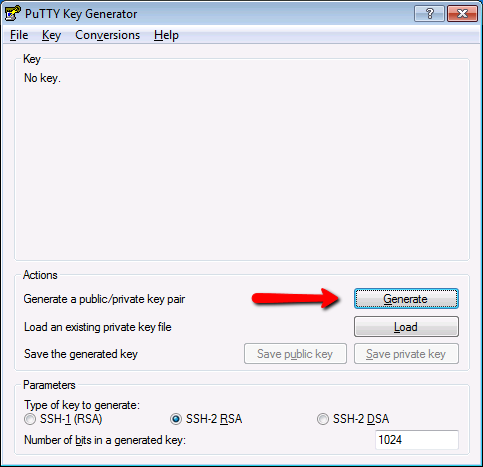
Now that the PuTTY suite is installed, open up PuTTYgen and click Generate.
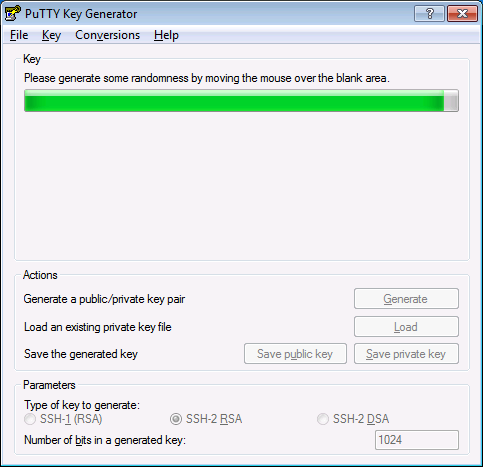
Windows doesn't have a truly random number generator like /dev/random, so you'll need to provide your own randomness.
After you've shaken your mouse frantically for a minute or so, you'll have your new key. Make sure to set a strong passphrase on it.
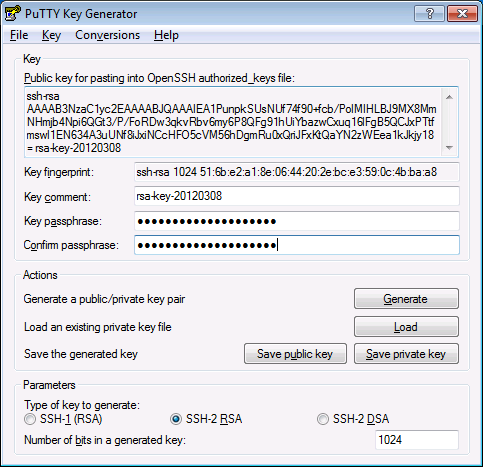
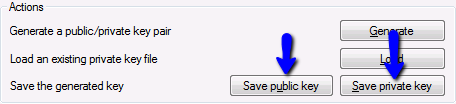
Next, click these buttons to export both parts of the key to files. Save them in a location where they can stay permanently but are easy to find. We'll need them in a bit.
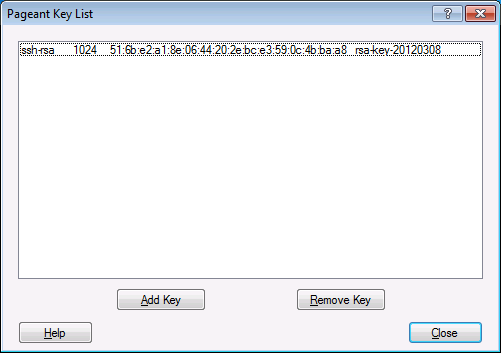
Once you have the keys, open Pageant and double-click on the computer wearing a fedora in the system tray. Hit "Add Key" to add the key we just created.
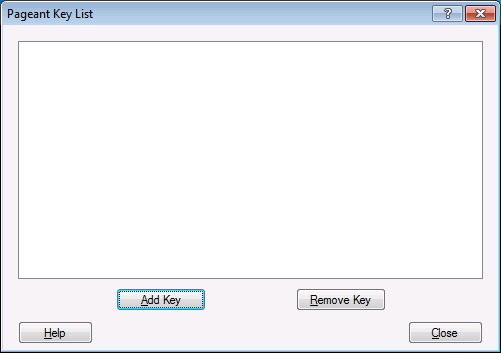
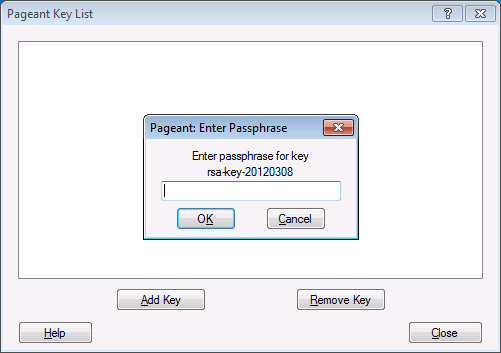
Find the private key (.ppk file) that you just created and add it. You'll be prompted to enter the passphrase for the key.
And that's it. PuTTY will attempt to use the keys added in Pageant before prompting for a password. You can enable authentication forwarding in PuTTY as well by checking "Allow agent forwarding" in Connection -> SSH -> Auth.