(A) Setting Up Your Environment to Run Amira
1. Amira can currently only be run from jane, so you will first need to ssh to jane:
$ ssh -Y jane.crbs.ucsd.edu
2. Enter the directory that contains your reconstruction. For example:
$ cd /ccdbprod/ccdbprod2/home/CCDB_DATA_USER.portal/CCDB_DATA_USER/acquisition/project_20191/microscopy_87042/reconstruction
3. Start Amira:
$ /ncmir/local.linux.amd64/Amira-5.4/bin/start
If you want, you can setup your login script to alias this command to the command 'amira'. To do this, add the following line to your .bashrc file by editing it in a text editor (vi, emacs, nano, etc.):
alias amira='/ncmir/local.linux.amd64/Amira-5.4/bin/start'
If you do this, the next time you use Amira, you will only have to type the command 'amira' rather than the full path.
(B) Preparing Volumes
Your reconstruction should already be in the MRC format if it was calculated using IMOD or TxBR. If your reconstruction is from a 4k x 4k camera, you should be able to load the full volume into memory on jane without any performance issues. However, if it is from the 8k x 8k camera or is a montage, you will need to bin it so Amira's performance will not suffer.
All files MUST have a .mrc extension. If they do not, they will not be read into Amira properly once you exit and restart the program!
1. If your volume needs to be binned, use the following command to bin by a factor of 2:
$ newstack -bin 2 basename.mrc basename_2Dbin2.mrc
2. When you perform the maximum intensity projection (MIP) calculations, you need to make sure your volume is devoid of all gold particles, as they will dramatically skew the calculation and result in unwanted artifacts. Open your original reconstruction file in imod. Find the minimum and maximum Z-slices at which the volume is free of gold particles. Make note of these two values, and subtract one from each of them (we'll call the final values Zmin and Zmax). We will create a second MRC file in which these Z-slices are trimmed out in the next step.
3. To perform the MIP calculations, you also need to have a volume with the contrast inverted such that electron dense regions appear white. This is opposite from what we are used to. Since the MIP calculations take a long time and the MIP rendering really slows down Amira, it is helpful to perform the calculations on a binned volume.
We can combine the binning, contrast inversion, and trimming all in one command.
If you have already binned your volume in Step 1, run the following command to invert the contrast:
$ newstack -scale 255,0 -secs Zmin-Zmax basename_2Dbin2.mrc basename_2Dbin2_inverted_trimZ.mrc
If you haven't already binned your volume because it is from a 4k x 4k camera, run the following command to perform the binning and contrast inversion operations simultaneously:
$ newstack -bin 2 -scale 255,0 -secs Zmin-Zmax basename.mrc basename_2Dbin2_inverted_trimZ.mrc
(C) Loading the Volumes into Amira
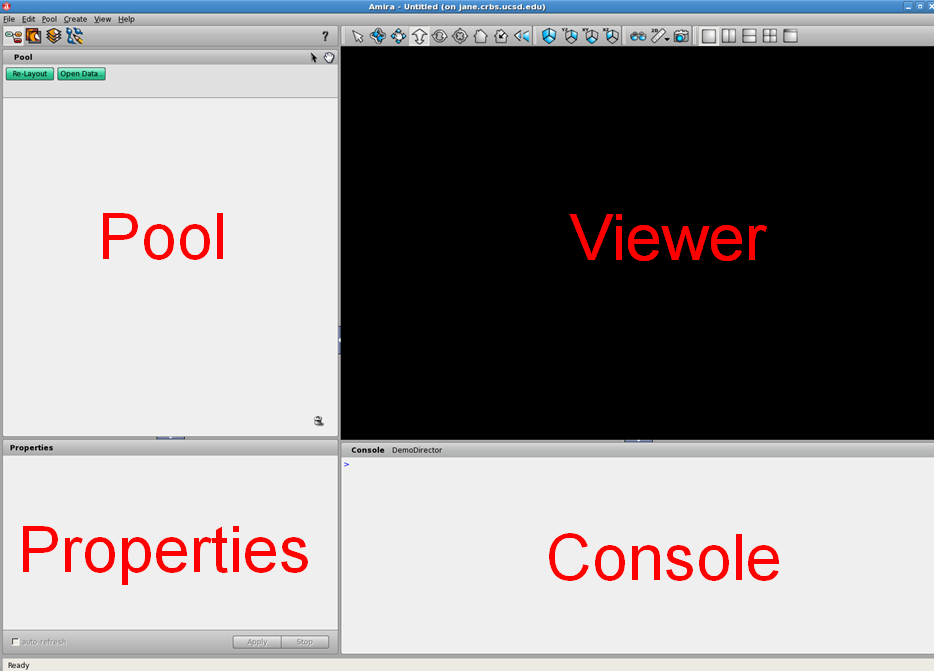
The Amira GUI is divided into four main frames. In the image below, I've given them names that I'll refer to for the rest of this tutorial:
1. In the Pool frame, click the green 'Open Data' button. Select your current directory from the upper pull-down menu (it should be the top choice), and select the first volume (basename.mrc OR basename_2Dbin2.mrc). Click the 'Load' button and select 'MRC Volume' in the 'Dialog' pop-up window. Click the 'OK' button.
2. After a small delay, you should see a new green button with your reconstruction name appear in the Pool frame.
3. Repeat step 1 for your volume with inverted contrast (basename_2Dbin2_inverted.mrc. You should see a second green button appear in the Pool frame.
(D) Displaying a NCMIR Logo
1. In the Pool frame, click the green 'Open Data' button. In the 'Look in' prompt, type the following: /home/aperez/amira/NCMIR_logo_IV
2. You will have three options. Each of the three options are different sizes, but all three will load in the lower left corner of the Viewer frame.
3. Choose which size you prefer, then click 'Load'.
4. Right-click on the new green button for the logo, and select IvDisplay. This will cause the logo to appear. If you do not like the size and would like to try another size, simply left-click on the green button for the logo and press the delete button, then load a new one.
(E) Displaying the Original Reconstruction
1. First, set the background color to solid black. In the upper menu, select View --> Background. Select the 'uniform' mode, then click on the color 1 button and select black. Click 'OK'.
2. Right-click on the green button for the original reconstruction in the Pool frame, and select OrthoSlice. You will see an orange OrthoSlice button appear connected to the green button.
3. Left-click on the OrthoSlice button. Set the Transparency to 'Binary' to eliminate the orange border from around the volume.
4. Move the Slice Number slider back and forth to scroll through the Z-slices of your volume. Notice how the slices appear to get smaller and bigger as you go up and down? This is because the camera is set to Perspective mode by default. To make the slice dimensions remain constant as you scroll through Z-slices, you need to change the camera mode to Orthographic. In the menu of icons above the Viewer frame, find the icon that looks like an eye with rays emanating from it. Click it once to switch to Orthographic mode:

5. Left-click on the OrthoSlice button. Click on the 'Edit' button under Colormap, and select 'Adjust to Histogram'. This will auto-contrast the tomogram.
6. If you are not satisfied with the auto-contrast, you can tweak it by clicking and dragging on the two indicators in the Colormap.
Pool --> Open Data --> Select Data --> MRC Volume
Right click on button --> Display --> Voltex
Left click on Voltex button
Color table
Luminance/alpha
Colormap --> Edit --> Adjust to histogram, then adjust the min and max values accordingly
Alpha scale = 1
Texture mode: 2D
Downsample: 2 2 2
Apply
(click the image to view it at full resolution)